Installing Rockville SS10P Subwoofer With Niche+Easy Brackets | Page 3 | Kia EV Forum
Kia EV Forum banner
41 - 60 of 86 Posts
Nice work and thanks for posting the details and pics! (y)

FWIW I would wrap the terminals that you added since one will be "hot" with the ignition on. Odds are nothing will ever short it out but I'm a little OCD about those things. Exposed terminals make me wince. 😣 😆

Hope you and the missus are enjoying your "new" stereo!

View attachment 23247
🎶
The connectors highlighted here, are these male spade that are soldered to the wires plus yellow heat shrink tube? Thanks.
 
The connectors highlighted here, are these male spade that are soldered to the wires plus yellow heat shrink tube? Thanks.
They’re basic spade connectors. The ones for smaller gauge wire will slip into the hot pin-out area of the trailer wiring connector. Since I used 8 AWG wire for power I had to snip the edges of the spade connector off to get it to fit. Others have used smaller gauge wire for power.

Otherwise, yes the wire’s soldered to the connector with heat shrink over it. I wrapped the wire and connector with some Tesa tape to make sure everything stayed in place.

@tvxnt used the 12v accessory outlet to power his setup, so a little different than mine.
 
Thanks @DadPool for the brackets!

Now on to the install question, I want to do the piggyback to the trunk 12V from behind the plug as the first option, if that fails, second option would be to use a 12V cigarette plug and run the wires from that plug. I'm not handy at all, I took apart another car's dashboard and both front side door once and broke some tabs. I saw posts above taking a part the left driver trunk wall. If you remove the trunk wall, can you let me know please where are the tabs in the picture below and what would be an easier way to remove this wall cover? Thanks!

Image
 
Thanks @DadPool for the brackets!

Now on to the install question, I want to do the piggyback to the trunk 12V from behind the plug as the first option, if that fails, second option would be to use a 12V cigarette plug and run the wires from that plug. I'm not handy at all, I took apart another car's dashboard and both front side door once and broke some tabs. I saw posts above taking a part the left driver trunk wall. If you remove the trunk wall, can you let me know please where are the tabs in the picture below and what would be an easier way to remove this wall cover? Thanks!

View attachment 23526
Watch the video below to see how to remove the side cover - you don't have to completely remove it, just enough to get behind it to access the wiring. As long as it's warmish there's no need to worry about breaking any tabs or retainer clips. Everything pops off pretty easily.

This earlier post by @tvxnt shows how he tapped into the 12v outlet.

There's a more robust thread discussing all of the subwoofer options:


Hope that helps!

 
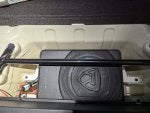
Thanks @DadPool for the great write-up and the quick delivery of the set of brackets. I have completed the install of the SS10P in my EV6 and it is a huge improvement over the stock sub!
I did follow @andirivieni suggestion of using shipping foam from the SS10P as support under the sub. And used the RWK81 SSP10 wiring kit that @RSA mentioned to wire everything up.
I didn't really like the idea of having something always plugged into the 12V outlet in back and I had already used the trailer port for an auto door lock device I got from "The Ioniq Guy" so I ran the power directly from the battery. That required me to poke a small hole in the rubber firewall boot to run power to the sub. I also put the remote under the infotainment/climate control panel as @tvxnt showed. Running the wires for power and the remote were a bit of a pain, but if you're patient it's not too bad. Following is the final result

Image
 
My contribution post. Let me start by saying that I'm not handy at all, I don't have all the necessary tools other than ratchet wrench and phillips screw driver unlike others who may have a dedicated garage space for all their tools.
I did the Rockville SSP10 install forgoing the remote.
I actually did all the wire connections while sitting in my home office, all my wires are done before I even open my car's trunk. There was a post by HDClown on reddit that describes how to connect the Kia part number 1879003730AS with the Rockville cable. I did the piggyback spade connectors to the cig lighter in the trunk. I spent the most time trying to 'snip' the spade connector to fit the positive from the cable (the original connector) that goes into the back of the cig lighter. If you're going down this road, I'm guessing a 4.8mm piggy back connector may work better than the standard 1/4inch connector. When running the ground to the car, I use a ring terminal, make sure this is at least 3/8 inch ring since the bolt size is 10mm.
 

Attachments

Now onto my question, does anyone find that there is some rattles from the area of the sub when the sub is pumping? I feel I can definitely push to hold the area just above the license plate so it's tighter to reduce the rattling. I'm setting about 120Hz, gain about half and cross over about half. Not all tunes, but some deep bass tunes like Thievery Corporation - A warning or Lebanese Blonde or Here comes the Hotstepper definitely rattled the trunk area with the car's volume just around 20 or 25 (after the recent firmware update).
Anyone else experience the issue?

How do I reduce rattling so I can enjoy the music better without the "extras"?
Congrats on a job well done!

I've noticed the same with our GT and will be installing some sound deadener. I added it to our GT-Line but sold it before I could install the new sub. It actually made the Meridian sub sound a little better. More here about how/why:


Haven't used this particular brand, but they're all about the same and this 80mil x 10sqft pack should be all you need and it's reasonably priced:


Image
 
Congrats on a job well done!

I've noticed the same with our GT and will be installing some sound deadener. I added it to our GT-Line but sold it before I could install the new sub. It actually made the Meridian sub sound a little better. More here about how/why:


Haven't used this particular brand, but they're all about the same and this 80mil x 10sqft pack should be all you need and it's reasonably priced:


View attachment 23657
Thank you for your suggestion, indeed this looks like a good idea. I'll report back my experience once I'm done with it.
 
Thank you for your suggestion, indeed this looks like a good idea. I'll report back my experience once I'm done with it.
No guarantees of course. Some parts need to be better secured to stop rattles straight from the factory. But the sound deadener should help to isolate the sub's vibrations. It should also reduce the overall cabin noise a bit as well as improve the sound from the sub. I will report back as well! (y)
 
Just did this install, OP's brackets made it look very nice. Sounds much better than stock too, though I'll need to do some further fine tuning. Currently I'm using the same +1 Treble +0 Mid +3 Bass on Meridian Authentic preset I was using before installing the sub and it sounds pretty good. On the sub, I currently have LPF set all the way up (pretty sure the factory Meridian amp takes care of this anyway), Bass Boost all the way down, and Gain set to about 33%.

I have two regrets with this install that hopefully someone else can learn from.

1: Don't bother with the piggyback spades. Just use a Posi-Tap or something to tap the factory harness.

Reason: The terminal sizes on the back of the rear 12v outlet are not standard. The blade for the ground is thicker metal than a normal spade connector, and the blade for the positive is narrower in width. There's nowhere for me to buy piggyback spades locally and none were linked in any thread here, so I got a random 25-pack from Amazon. I'm sure they're all the same or similar anyway. I tested them before installing and they fit tightly and securely on all 3 connections using known good male and female spade connectors I have laying around. As I went to perform the installation, they also fit on the back of the 12v power socket just fine.

However, that was not the case for the factory harness side of things. The ground was worryingly loose and the positive simply would not fit (someone mentioned about the positive earlier in this thread). Grinding material off the edge of the piggyback spade made it fit the positive one, but this was an irritating process. Grinding enough material to get it to fit kept causing a layer of metal to sheer off and then it would be too loose (due to the way the piggyback spades were constructed with folded-over metal). I went through about 5 of them before I was able to grind enough material off to force it in without sheering off half the metal. As for the ground, the only way I got a somewhat tight fit was by bending the blade of the spade so that it bowed outward toward the bottom side of the factory connector. It fit relatively snugly then and seemed to make decent contact, but is not an ideal solution. I don't know where I'd find thicker piggyback connectors or if that even exists.

I wrapped the connections behind the 12v with electrical tape a few times to hopefully hold everything together and give it some support, but a Posi-Tap would have been way less annoying and probably made a much better connection.

2: Don't use thicker power wire than you have to. 12awg wire is fine. This is a 20amp sub (you can see the 20amp fuse on it). Ignore all the marketing BS Rockville says about 800w. It's not ever going to draw more than 20amps so you can use 12awg wire. I used 10awg, and found it was thick and somewhat annoying to work with. I should have just used 12awg since it would cause less strain on the connectors behind the 12v power socket.

Edit: After using this for a week, I've found this to be the best settings for me:

Phase:
ON (180) - When set to default 0, I noticed that the bass is relatively quiet in the driver's seat. When set to 180, it is much louder. I've been told by an audio person that I should set this to whatever setting sounds louder, as that means the sub when set to the other setting is probably phase cancelling with the speakers.
Auto Power On: ON
Low Pass Filter: All the way up. I'm almost certain the Kia amp already has a low pass filter built into it for the stock sub, so you basically want to turn this off by having it set to the maximum.
Bass Boost: All the way down. Bass Boost never sounds good imo, it's like adjusting the gain but worse. Leave it off.
Gain: About 50%, maybe slightly past that.

In the Kia audio system, I have it set to Meridian Authentic, +1 Treble, +0 mid, and +0 bass (previously had +3 bass but found it was WAY too bassy after putting in the sub, even with the sub turned down a good amount).

The main caveats to this setup is that the stock Kia amp doesn't pass anything below about 35-40Hz to the subwoofer. The other caveat is that the bass is louder at low volume and quieter at high volume which others have mentioned. This is due to the (underpowered) stock audio setup as designed by Kia; other cars have this problem too. All you can really do is adjust the subwoofer manually if it bothers you. There is another thread somewhere here with a lot of good info if you really want to get around both of those issues by tapping directly into the audio before the amp, but it's a lot of extra work to do that and also still have it work with the volume control so I'm not ever going to do that myself.
 
41 - 60 of 86 Posts